December 29, 2010

Chewy Chocolate Raisin Cookies

I'm guessing that right now isn't the most opportune time to be posting a string of cookie recipes.  You may still be recovering from what I affectionately call a "Christmas Cookie Coma," you may still have way too many cookies in your house, you may not want to look at another cookie until next Christmas, but here I am posting more recipes for cookies.  I apologize.  This blog may not be good for your new years resolutions.

Chewy Chocolate Raisin Cookies also may not sound very appealing to you.  To be honest, they didn't sound very appealing to me either.  But as the saying goes, you can't judge a book by it's cover and you certainly shouldn't judge a recipe by it's title (though I admit I'm usually guilty of the former).

My beloved former roommate soul-mate (Helen, that's you!) introduced me to these cookies last year when she and her friend made them as part of their Christmas gift-giving.  They over-baked them a bit, and soaked the raisins in sherry instead of brandy, but it didn't matter.  I couldn't get enough.  I don't even really like white chocolate, but it didn't matter.  I couldn't get enough.

So needless to say, I had to make these cookies this year.  Did they live up to my nostalgia-driven expectations? Yes and no.  Yes, because they still tasted great.  No, because, well, does anything ever live up to nostalgic expectations?  But that's another discussion for another forum.  These cookies are worth making and they're very unique.  White chocolate, sherry, golden raisins, cocoa powder, cinnamon, and honey-- how can you pass up such a combination?

Sarah's Chewy Chocolate Raisin Cookies
Minimally adapted from Sarah Carey via Martha Stewart

Ingredients
1 cup golden raisins, coarsely chopped
1/2 cup sherry (I used dry sherry)
1 1/2 cups all-purpose flour
3 tablespoons Dutch-process cocoa powder
1 1/2 teaspoons ground cinnamon
3/4 teaspoon baking soda
1/2 teaspoon coarse salt
4 ounces (1 stick) unsalted butter, softened
1/2 cup packed light-brown sugar
1/2 cup honey
6 ounces white chocolate, cut into 1/2-inch pieces
1/2 cup fine sanding or granulated sugar

Preparation
Bring raisins and sherry to a boil in a small saucepan. Remove from heat, and let stand for 20 minutes. Meanwhile, whisk together flour, cocoa, 1 teaspoon cinnamon, the baking soda, and salt.

Preheat oven to 325 degrees. Beat butter and brown sugar with a mixer on medium speed until pale and fluffy, about 2 minutes. Add honey, and beat until creamy. Reduce speed to low, add flour mixture, and beat until combined. Drain raisins; discard liquid. Add raisins and chocolate to dough. Mix to combine.

[The dough will be very wet, I had trouble shaping it into balls as it was so I threw it in the fridge for a little while to make it easier to handle]

Whisk together sanding sugar and remaining 1/2 teaspoon cinnamon. Scoop 2 tablespoons dough [I used less for smaller cookies]. Roll in cinnamon-sugar mixture, and shape into a ball. Roll in cinnamon-sugar mixture again to coat completely. Repeat with remaining dough. Transfer to parchment-lined baking sheets, spacing about 2 inches apart, as you work. Bake until just set and starting to crack, 18 to 20 minutes. Let cool on sheets.

Many more Christmas recipes to come: Chocolate Bread, Peppermint Marshmallows, Rainbow Cookies (!!!), Spinach Artichoke Dip, and a Chocolate Chip Cookie taste off.  Stay tuned.

December 7, 2010

Middle Eastern Banana Bread

I don't know if I've mentioned this before, but I'm not good at baking banana bread.  Maybe that's not exactly a fair assessment, because It's clear I know how to follow a recipe (most of the time...), but usually, when I make banana bread, it just ends up tasting "fine."  It's not great, or special, or something to blog about, although I've done that a few times anyway.  My "banana bread rut" is actually a shame because I really like the idea of banana bread.  I like to save ingredients from going to waste.  I like to re-purpose things.  I like bananas, and I really, really like bread.  So I push forth and keep making banana bread.  And I keep hoping I'll get it right.  I think this recipe's the one.

I found this recipe on a lovely blog I recently stumbled upon called My New Roots.  It's written by a woman named Sarah Britton, who works as a chef at two organic vegetarian restaurants in Copenhagen, Denmark (and if that's not lovely, I don't know what is).  I scrolled through a ton of Sarah's recipes but this one spoke to me-- perhaps because it's called the "Coziest Banana Bread" and I feel a lot like hibernating and being cozy these days.  Other than that though, I really like that this recipe uses spelt flour, a ton of bananas, and moderate amounts of better-for-you oils and sugars.  I had high hopes for it, which usually means I end up disappointed.  But not this time!

Of course, I changed a few things because I was in the mood for a slightly gussied up banana bread.  I still kept the base recipe pretty much the same so you could easily omit my Middle-East-inspired changes or just head over to Sarah's blog and see the original.  The result?  I think it's the best banana bread I've ever made.  And here's the catch: it's 100% whole grain, it's vegan, it's low in (natural) sugar, and it doesn't taste like you're making any compromises. I think we have a winner.

Middle Eastern Banana Bread 
I took this banana bread in a different direction with some ingredient inspiration from the Middle East.  The spices are very subtle because I didn't want to over-do it, but I think they could easily be kicked up a notch (though this also depends on the strength of your spices).  1 1/2 teaspoons cardamom and 3/4 a teaspoon cloves would probably be a nice adjustment.  Also, I only had 4 ripe bananas (~a scant 2 cups mashed), which may be why I needed a bit extra milk in the end.
Adapted from My New Roots

¼ cup milk of your choice [I used almond milk and needed a bit more, added at the end]
6 Tbsp. olive oil, butter, ghee, coconut oil [I used 1/2 coconut oil, 1/2 olive oil]
6 Tbsp. maple syrup
1 tsp. pure vanilla extract
2 ¼ cups mashed ripe bananas (approximately 5 medium bananas) [I only had 4... see headnotes]
1 1/2 cups whole spelt flour
1/2 cup whole wheat pastry flour
1 tsp. baking soda
1 tsp. baking powder
½ tsp. sea salt
1 teaspoon ground cardamom
1/2 teaspoon ground cloves
1/2 cup dried Turkish apricots, chopped
1/3 cup roasted pistachios, chopped

1 packet (~ 1 tablespoon) raw sugar for topping (optional, but recommended for a nice crunch)

Preparation
Preheat oven to 350F.  Oil a standard loaf pan or an 8 inch cake pan (this will change baking time from mine).

In a medium bowl, mix the milk, oil, maple syrup, vanilla, and bananas until blended.  In a large bowl combine dry ingredients. Add banana mixture and incorporate using as few strokes as possible. Fold in the chopped apricots and pistachios.

Pour into your pan and lightly smooth the top. Sprinkle the top with raw sugar and more spices, if desired.

Bake until a toothpick inserted in the center comes out clean (time varies greatly according to oven – mine took about 45 minutes, Sarah's an hour, and the recipe suggests only 30 minutes. Check periodically after the half hour mark.)

December 2, 2010

Better Than Butter

Not many things deserve this title, but mascrapone cheese just might.  Mascrapone is an Italian (triple) cream cheese that's a common ingredient in Tiramisu.  Ever since my birthday and, more specifically, my birthday cake, it's had a special place in my heart.  Unfortunately (but perhaps fortunately for my figure), I didn't have any left over after making the frosting for my cake; I also didn't have a reason to buy another 8oz container.  Thanksgiving is a reason, though.

So, for Thanksgiving, I whipped up some more mascrapone whipped cream to go with the Pumpkin Pie and Gingerbread Upside-Down Cake.  This time I used fresh vanilla bean, though I think it was better with vanilla extract.  Since we didn't need that much whipped cream on Thanksgiving, I've been left with more than half a container of pure mascrapone-y deliciousness to spread and dollop on top of whatever I can get my hands on (it's not doing anything good for my post-Thanksgiving bloat, by the way).

While it was pretty good on oatmeal, I think my favorite way to consume it thus far is in lieu of butter on a toasted whole wheat cinnamon raisin English muffin (I bought some at Trader Joe's this weekend).  However, the side of the container has advised me to "swirl it into Alfredo sauce, risotto, pasta, or use as a fruit topping" and now all I can think about is rich, creamy mascrapone cheese swirled into mushroom risotto.  It's only a matter of time.

November 28, 2010

Thanksgiving Dinner

I kind of put blogging on the back burner this Thanksgiving and, as a result, I don't have many photos to show you.  I do, however, have a bunch of links to some great recipes, and maybe a couple of scars from food shopping the day before Thanksgiving and clothing shopping on Black Friday.

This Thanksgiving I made almost everything, except for the turkey and a side dish or two.  While for some people that might be a stressful or nightmare-ish task, I actually enjoyed it.  Here's a rundown of what I made, if you're interested:

Arugula Salad with Dried Figs, Walnuts, and Cherry Balsamic Vinaigrette

Skillet Cornbread with Honey Butter:
My dad liked this cornbread a lot, and it was good in the stuffing but, I think a 1:1 ratio of cornmeal to flour may have been more my taste because I found it a little dense.  I also used butter instead of shortening and I think 1 tablespoon to grease the skillet (as opposed to the 2 called for) is more than sufficient.

Cornbread Stuffing:
Made with half the Skillet Cornbread and half a whole wheat baguette.  Stuffing is always good. 

Sauteed Mushrooms with Sun-dried Tomato and Onion:
Ok, ok, I think I really like mushrooms now.  Sauteed with chopped oil packed sun-dried tomatoes and lightly caramelized onion, these make me forget I used to be a mushroom hater.  I'm working on having a more detailed recipe up soon but I keep forgetting to take pictures...
 
Vegan Gravy:
I liked this gravy WAY more than the one my parents bought from a local market.  It's definitely got a strong, bold flavor but I really enjoyed that.  I've been eating it on crostini spread with goat cheese (yes, this totally defeats the purpose of it being vegan), using it as a sauce for mushrooms, and having a few licks off the spoon.  I bet it'd also be good on mashed potatoes, but I forgot to pick those up at the supermarket.

Cranberry Sauce with Dried Fruit:
A standard cranberry sauce made with less sugar with about ~1/3 cup dried fruit (cranberries, cherries, blueberries) mixed in near the end for a nice textural element.

Apple Compote

Sauteed Green Beans with Leeks

Butternut Squash and Caramelized Onion Galette:
Yum, yum, yum.  This tart was wonderful, but definitely on the heavy side so take note of that when cutting your piece.  We all agreed that we could feel ourselves getting more and more full with each delicious bite.  Edited to add: I used Gruyere cheese in lieu of Fontina for the filling and I wouldn't change a thing.

I did have A LOT of problems with the crust, but it's probably because I'm not a seasoned tart-crust-maker.  I also subbed in Greek yogurt for sour cream, but I don't think that was the problem.  Basically, it started out too soft even after an hour in the fridge.  Then, I stuck in the freezer and proceeded to forget about it.  When I finally remembered it was in there, it was hard as a rock and I didn't have time to wait for it to defrost, so I threw it in the microwave for a bit, and then back in the freezer to have it set up again.  Then, FINALLY, it was time to roll it out.  Luckily, that part was easy and it ended up tasting great.

Libby's Pumpkin Pie:
The classic.  My younger sister mentioned she'd never had pumpkin pie and was interested in trying it (at 2:30pm on Thanksgiving day, mind you), so my mom and I quickly whipped this up and it was a hit.  I'm not the biggest pumpkin pie fan but if I am going to eat it, I prefer it served cold, perhaps with a gingersnap crust.

Gingerbread Pear Upside-Down Cake:
I love the texture of this cake and the rich molasses flavor.  I added about 1/4 cup finely chopped crystallized ginger to the batter and subbed in bosc pears for apples (originally it was a Gingerbread Apple Upside-Down Cake).  Although the recipe suggests serving it whipped cream, which I did on Thanksgiving, I actually prefer it without, so I can get the full intensity of the gingerbread flavor.

November 22, 2010

Apple Compote

When I saw fresh local apples for 99 cents a pound, I had to buy some.  I decided to make apple compote because not only does it remind me of apple pie filling, but it also reminds me of baked apples.  And no, not the baked apples you core, stuff, and bake in the oven (those are good too though), but the ones from Stouffer's or Boston Market that are served warm, blanketed in a rich cinnamon flecked sauce.  Does anyone else have fond memories of those, or is that just me? Anyone?  I also used to love Stouffer's Swedish Meatballs, but I suppose that's a discussion for another time.

Prior bad eating habits aside, this compote is truly addicting.  I finished a jar within two days! Luckily, it's much better for you than the Stouffer's or Boston Market variety.  Oh, and if you're thinking "what could I possibly do with two or three jars of apple compote?"  Well, I'll tell you:
  • You could make a sandwich with toasted cinnamon raisin bread, almond butter, and apple compote (I haven't done this or anything...).  
  • You could use it as a topping for oatmeal, Greek yogurt, or ice cream.
  • You could use it as a condiment for roast pork.
  • You could also eat it out of the jar, that's allowed.
As you can see, there is really no shortage of ways to put this apple compote to use.  I even stuck some in the freezer because I imagine it'll be pretty tasty on Thanksgiving turkey, stuffing, and... roasted brussel sprouts.  Maybe that last one's a little bit of a stretch, but you get the idea.

Apple Compote
Adapted from Martha Stewart

Ingredients
3 lbs apples, peeled, cored, and chopped
~ 2 tablespoons fresh lemon juice
2- 3 tablespoons pure maple syrup
1 teaspoon ground cinnamon
1 pat good quality salted butter (optional, but suggested)

Preapartion
Combine all ingredients in a large pot. Cover, and cook over low heat, stirring occasionally, until apples are tender, about 30 minutes. Let cool completely. Apple compote can be refrigerated in an airtight container up to 1 week.

November 17, 2010

Lavender Honey Spice Cake

This is my kind of cake, but sadly, I can't take any credit for the unique mix of flavors that make it a stand out.  I found the recipe on Serious Eats and kept it pretty much as is because making major changes just didn't seem right.  So, instead of inserting my adaptations into the recipe, I noted my minor tweaks on the side, because I think you deserve to have the recipe in it's original form.

The flavors are complex, but subtle, and the cake pairs oh so perfectly with a mug of hot tea.   

The first word that came to my mind after just one bite was "delightful."  And it really, really is.  I was so happy with how it turned out that I even brought some to a few of my friends and their families.  Some of them commented on the moistness, others on the notes of fennel and cinnamon.  Everyone asked what was in it and everyone was impressed.  This is a recipe for the archives if there ever was one.


Lavender Honey Spice Cake
From Gina DePalma on Serious Eats

1 1/4 cups unbleached, all-purpose flour [I used 3/4 cup plus 1 tablespoon]
1/2 cup plus 1 tablespoon whole wheat flour [I used 1 cup]
1 teaspoon kosher salt 
1 teaspoon baking powder 
1/2 teaspoon baking soda 
1 teaspoon ground cinnamon 
1 teaspoon ground ginger 
1 teaspoon ground fennel seed 
1/2 cup packed dark muscovado sugar or dark brown sugar [I used 1/3 cup packed]
1/2 cup lavender honey*
2 large eggs 
6 tablespoons unsalted butter, melted and cooled 
Freshly grated zest and juice of 1 orange 
1 teaspoon pure vanilla extract 
1/2 cup plain Greek-style yogurt [I used Fage 0%]
2 Tablespoons hot water

Preparation
Preheat the oven to 325°F. Grease and flour a 9-by-3 inch loaf pan.  In a medium bowl, whisk together the flours, salt, baking powder and soda, and spices, and set aside.

Place the sugar, lavender honey, and eggs in the bowl of an electric mixer fitted with the paddle attachment and beat them together on medium speed until the mixture is creamy and light, about a minute. Beat in the melted, cooled butter, followed by the orange juice and zest and vanilla.

In a small bowl, stir together the yogurt and hot water. Beat in 1/3 of the dry ingredients into the sugar and butter mixture, scrape down the sides of the bowl, then beat in 1/2 of the yogurt mixture. Follow with another 1/3 of the dry ingredients, followed by the rest of the yogurt, and ending with the last of the dry ingredients, scraping down the sides of the bowl after each addition. Beat the batter well for 20 seconds to fully emulsify it.

Pour the batter into the prepared pan, smoothing and evening the top. Bake the cake on the center rack for 40 minutes [mine took about 50 minutes], rotating it halfway through the baking time to ensure even browning [Warning: I attempted to to this halfway through baking and the cake was FAR from set... if I would have moved it to rotate, it would have turned into a cake wreck.  I would wait longer if you're going to rotate]. The cake is done when it is cracked and firm to the touch, and slightly pulling away from the sides of the pan; a cake center inserted in the center should come out clean.

Allow the cake to cool for 10 minutes in the pan before removing it to a rack to cool completely. To serve, cut into even slices.  The cake may be stored for up to 3 days in an airtight container.

*I used to buy lavender honey from a brand called "Palette." Unfortunately, I think they went out of business so I bought lavender herb (the dried buds would probably work too) and infused it into the honey by heating it on the stove.  See this website for more specifics on infusing honey.

November 12, 2010

My Morning Müesli

I recently started working part-time in New York City.  While working part-time is nice (who doesn't want a day or two off during the week?), it also makes it a bit difficult to get into a 'regular' schedule.  So for now, I still eat dinner too late, go to bed past midnight, and have the occasional "2:30 feeling" when I'm at work.  To make the transition smoother, and my mornings less hectic, I've started preparing my breakfast the night before and eating it on the train in the morning.  It's true, not all breakfasts lend themselves so well to night-before preparations (soggy egg sandwich anyone?), but one breakfast certainly does, and that's Muesli.

Müesli, also called Bircher Müesli or Swiss Müesli, was developed in the 1900's by Swiss physician Maximilian Bircher-Benner.  Basic Müesli is a mixture of soaked raw oats, yogurt, milk, citrus juice, honey, nuts, and fresh or dried fruit.  Of course, additions and subtractions are easy and endless.

On a typical night before work, I'll come into the kitchen and mix up some oats, yogurt, "milk," and dried and fresh fruit in a clean jam jar.  In the morning I give it a stir and then decide what other fresh fruit, nuts, and toppings I'm in the mood for.  It's simple, healthy, and totally worth the few inquisitive stares I get when I pull a glass jar and metal spoon out of my bag and start to eat Müesli on the train.

My Morning Müesli
I never measure any of this out but I did this morning just for you!  Below is my usual recipe, but feel free to use your favorite fruits and nuts.  I like to change mine up every so often because too much of the same gets boring!
Serves 1

Ingredients
1/4 cup old fashioned rolled oats (not the quick kind)
generous 1/4 cup milk of choice, I use almond or soy
1/2 cup Greek yogurt
a squeeze or 2 fresh lemon or orange juice (optional)
1/2 tablespoon ground flaxseed
1 tablespoon dried cranberries
1- 2 dried apricots
6 red grapes, halved
1/2 a medium apple, small dice or shredded
7 almonds, roasted and chopped
honey, for drizzling

Variations and Additions: cinnamon, maple syrup, roasted cashews, macadamia nuts, raisins, dried cherries, dried figs, dried coconut, fresh blueberries, banana, peaches, fruit compote, jam or preserves...

Preparation
The night before: Mix all ingredients together in the vessel you intend to eat out of in the morning.  Since I'm not the biggest mixer (I like toppings!), I usually only mix the oats, milk, yogurt, citrus juice, flaxseed, dried fruit, and maybe one fresh fruit in the night before. Then in the morning I add my other ingredients on the top to create some textural variation (i.e. crunchy nuts, crisp apple, chewy dried fruit, jammy jam...).  Experiment to find what you like best.

November 5, 2010

Easy Vegetarian Casserole

I know it's been awhile since I've posted a savory recipe.  I guess that's because, the truth is, I'm more of a baker at heart.  I make savory dishes often but mostly out of necessity (gotta feed myself breakfast, lunch and dinner) but I bake because I love it.  So, I hope none of you, readers, mind that this blog has veered much more in the direction of baking as of late.  I'll still post savory recipes occasionally, but I have much more fun talking about and experimenting with baked goods.  Plus they're much prettier to look at, don't you think?

This casserole came together very quickly one night when I didn't feel like devoting that much time or energy to cooking dinner, but still wanted something tasty, healthy, and comforting (I have high standards, if you didn't already know).  This ended up being much better than I expected, which is why I decided to share it with you.  It was a leftover that I didn't mind eating, and that says a lot.

Below is a rough recipe because when I cook, I don't really measure out ingredients.  Casseroles are pretty forgiving anyway.

Easy Vegetarian Casserole
Makes enough for 1 bread pan sized casserole dish, easily doubled
Inspired by Gourmet

Ingredients
Tomato sauce (I used my homemade version)
1 15oz can black beans, rinsed and drained
~2/3 cup brown rice, millet, or other whole grain
generous 1/2 cup 1% cottage cheese
a few handfuls of spinach, just wilted in the microwave (about 15 seconds)

Topping
~1/2 block firm tofu, drained and pressed
~1/4 cup medium hard or hard cheese, freshly grated (I used a mix of cheddar and gruyere)
~1/4 cup fresh whole wheat breadcrumbs
1/4 teaspoon salt
pinch of pepper
pinch of oregano
sprinkle of crushed red pepper flakes (optional)

Preparation
Preheat your oven to 350 F. 

Using your fingers, crumble the tofu into a small bowl.  Mix in the rest of the topping ingredients and set aside.

Spread a thin layer of tomato sauce on the bottom of your pan.  Top with all the black beans and spread to cover completely.  Layer the brown rice above the black beans followed by a layer of tomato sauce to cover.  Top the tomato sauce with roughly tablespoon-sized spoonfuls of cottage cheese, no need to spread these out.  Add a layer of spinach over the cottage cheese and top with tomato sauce.  Lastly, pour the topping evenly over and add a bit more grated cheese if desired. 

Place in the oven and bake for 30- 45 minutes, until the casserole is warmed through.  Move the dish to the top rack near the end of cooking to ensure a browned crust. 

October 31, 2010

Halloween Roll Cookies

You didn't think I'd let Halloween pass by without posting some sort of themed confection, did you?  Although Halloween (and its candy) may have lost some of the charm it had when I was younger, I'm still a big fan of the spooky decorations, horror movies, and costumes.  This Halloween, I decided to make roll cookies with some Halloween cookie cutters I bought from Sur-La-Table for 56 cents each! I guess being last minute has its perks.

For the cookies, I used a recipe that my family used to make every Christmas.  It's the Rich Roll Cookies on page 661 of Joy of Cooking.  I'm not going to reprint the recipe here both for copyright reasons and because I think everyone owns, or knows someone who owns, a copy of Joy of Cooking. The recipe is basic (and buttery) but it also stirs up some nostalgia for me and that's why I think it's just right.

Spot the hipster cookie
For decorating, I made a simple icing with a mix of confectioners sugar and milk.  This icing isn't the tastiest on it's own but it's sweetness and simplicity complements the cookies nicely.  Though I'm not reprinting the recipe, I do have some useful notes and tips to share with you that aren't listed in the book:

1) You don't need to use any flour for dusting if you roll out the dough between two pieces of wax paper.
2) Working on a marble or granite surface will make removing the cut cookies and transferring them to a cookie sheet easier (the stone keeps the dough slightly chilled).
3) If you're having trouble moving your cookies from the wax paper to your cookie sheet, simply place the wax paper on the cookie sheet and put the whole thing in the freezer for about 7 minutes.  This will make peeling the cookies off MUCH easier.  It was a real life saver for me.
4) These are probably sort of obvious but... the thinner your cookies the more difficult they will be to transfer (definitely use the freezer method above for very thing cookies regardless of work surface). 
5) Cookies on a parchment lined baking sheet will cook more slowly those on an unlined baking sheet.
6) I prefer these cookies lightly browned because it makes their basic flavor a bit more complex.
Edited to add: 7) The recipe calls for 2 1/2 cups flour and I snuck in 1 cup whole wheat pastry flour... no one could tell the difference, even I forgot until just now!

HAPPY HALLOWEEN!

October 29, 2010

Apple Cider Muffins

 I think muffins are one of my favorite things to bake.  They're quick, they're difficult to mess up AND you can eat them for breakfast.  In the spirit of fall, I bought some fresh apple cider at a local market, and though I've been enjoying it hot and mulled, I couldn't resist experimenting with it in the kitchen.

I stumbled upon a few recipes for Apple Cider Muffins online but ultimately decided that this one from MegaCrafty looked the best.  The rolled in sugar tops reminded me of another recipe I've been lusting after: Donut Muffins(!)... but I'm saving that one for another time.

I liked these muffins a lot.  The cider flavor was subtle but present and the soft chunks of apples added a nice textural element.  They also lasted much longer (at least a week) than other fruit filled muffins I've made in the past, which usually end up a bit soggy after 3 or 4 days. 

Apple Cider Muffins
Adapted from MegaCrafty

Ingredients
1 1/4 cups apple cider
1 cup whole wheat pastry flour
1/2 cup unbleached all-purpose flour
1/2 cup light brown sugar, do not pack
1/2 teaspoon salt
2 teaspoons baking powder
1/4 teaspoon baking soda
1 teaspoon cinnamon
pinch of nutmeg
1 Honeycrisp apple, peeled and chopped into bite sized pieces
1/4 cup unsweetened applesauce
1/4 cup oil (any neutral oil will work)
1 egg
2 tablespoons no sugar added apple butter (I used Kime's Apple Butter Spread- this kicks up the cider flavor)
1/2 teaspoon vanilla

Topping:
1 1/2 tablespoons sugar
1 tablespoon cinnamon

Preparation
Preheat oven to 400 degrees. Butter your muffin pans or use muffin liners (makes 12- 15 muffins).

Bring apple cider to a boil in a sauce pan and reduce to a generous 1/3 cup of liquid. Remove from the stove to cool.

Mix the dry ingredients minus the chopped apple in a large bowl.  In a medium bowl mix the applesauce, egg, oil, vanilla and ONLY 1/4 cup cooled cider reduction. Reserve the rest of the reduction (~2 tablespoons) for later.  Pour the wet into the dry and stir just until just combined.  Fold the diced apple into the batter.

Put an even amount of batter into each muffin cup and bake for about 15- 18 minutes or until a toothpick inserted into the center comes out clean.

Remove the muffins from the pan to cool. Mix your cinnamon and sugar together in a shallow bowl or plate and have the reserved cider reduction ready.  Once the muffins are cool enough to handle but still warm, brush the top of each one with the reserved cider and roll the tops of each muffin in the cinnamon sugar to coat.

October 25, 2010

Pumpkin Pie Smoothie, My Way

We all know you can throw pretty much anything into a blender with some ice and call it a smoothie.  I'm sure everyone has their particular preferences- thick or thin, made with milk or juice, sweet or... salty (ew?).  As for me, I prefer thick smoothies, and taste-wise, I like them to go along with the seasons. 

Since the beginning of fall, I've been enjoying Pumpkin Pie Smoothies.  I'm not sure who thought up this idea, but I certainly can't take credit for it.  Below is just what works best for me.

Pumpkin Pie Smoothie

I use frozen pumpkin and unfrozen banana because it creates the best texture in my blender, which is strong enough to crush ice but it's definitely no Vita-Mix.  The unfrozen banana helps to gel the whole thing together without watering down the texture.  Also, I never measure the spices or the almond milk when I make my own so these are my best estimations.
Ingredients

5- 6 pumpkin ice cubes, see "Preparation"
4- 5 ice cubes
1/2 a banana, sliced (does not need to be frozen)
~ 1/2 teaspoon cinnamon
pinch cloves, nutmeg, and allspice
1/2 a scoop vanilla protein powder (optional)
~ 1/3 cup unsweetened almond milk, more as needed

Preparation
Pumpkin Ice Cubes:
At least a few hours before you want to make your smoothie, scoop canned pumpkin into a clean ice cube tray filling each cube 2/3 of the way up. Smooth out the top and add a very thin layer of almond milk to the top (don't worry if it doesn't cover the pumpkin perfectly). Place in the freezer until frozen.

Smoothie:
Pop out desired amount of pumpkin ice cubes and dump them into the blender along with the regular ice cubes. Blend on "Ice Crush" or highest setting until contents resemble a Sno-Cone-like mixture, about 1 minute depending on the strength of your blender (the sound will likely be unpleasant).

Scrape down the sides and add in the banana, spices, and protein powder, if using. Pour about 1/4- 1/3 cup almond milk on top and blend on medium-high scraping the sides as necessary. If the mixture isn't blending well, add a bit more almond milk and try again; I always heir on the side of less milk first because once it gets too watery, all is lost on your quest for a thick smoothie.

Pulse and blend until mixture is uniform but still thick. Pour into a glass and enjoy with a straw and a spoon. I like to add a layer of granola in the middle and top the whole thing with a bit more cinnamon.

October 19, 2010

Culinary Therapy

Sometimes, I just need to cook something. 

I cook for a lot of different reasons.  Some are practical like making dinner on a Sunday night or baking a cake for a special occasion.  Others are for the purpose of experimenting with new-found recipes or ingredients.  And others are more personal. 

Cooking takes my mind off things but it also helps me think.  It's cleansing, it's enlivening, it's very therapeutic, and that's why I love it. 

I find there are certain recipes that lend themselves more easily to what I'm going to call "Culinary Therapy" than others.  Those recipes would be things that are time consuming but not overly fussy.  Things like risottos, soups, stews, breads, and sauces.

Today, I made tomato sauce.  No recipe, no complicated twist, just ingredients I had on hand layered and seasoned and stirred with love.

Even though you probably already like cooking if you read my blog, for those of you that may still be a little timid, or cook only for practical purposes, I want to encourage you to get in the kitchen.  Spend an afternoon cooking not because you have to but because you want to.  Don't follow a recipe, don't measure ingredients, just have fun with it.  I hope you will.

October 12, 2010

Dark Chocolate Spelt Brownie Cake

If you're someone who experiments in the kitchen a lot, you know that sometimes new baking endeavors just don't turn out.  Other times they end up tasting alright, but not quite the way you wanted them too.  Occasionally though, you have a success and a pretty delicious one at that.

I have some whole spelt flour to use up but almost every time I've made cookies with spelt, they turn out overly soft and moist.  So, I thought why not experiment with making spelt brownies?  Soft and moist are definitely not bad qualities when it comes to brownies (or cakes, for that matter).  In the end, I decided these should be called brownie cake because, although I like cakier brownies, the texture of these was so light and delicate that "brownie" didn't seem quite right.  Honestly, they taste a lot like devils food cake, and that's nothing to complain about.

I love the flavor of these because it's deep, complex, and totally chocolate.  They're not too sweet, which is a plus for me, because I like to taste the true character of the chocolate, not just the sugary sweetness.  You can keep this as is for a thin loaf cake and frost it with your favorite icing, dust the top with powdered sugar, double the recipe and call it a sheet cake, or you can do what I did and cut it into squares... and then crumble it in between the layers of a breakfast parfait; I think that's my favorite way :)

Dark Chocolate Spelt Brownie Cake
This brownie cake is delicate and light so be sure to read the instructions about cooling and handle with care!  I think the delicate texture is due to the use of ONLY spelt flour.  If you want a denser brownie, I think subbing in a bit of whole wheat pastry flour for part of the spelt or using less flour altogether may help.  Also, please note that I made this in a loaf pan.  If you'd like to make it in a standard 8x8 brownie pan, I would double the recipe.

Ingredients

1/2 cup plus 1 tablespoon wholegrain spelt flour
1/4 cup unsweetened cocoa powder
scant 1/2 cup sugar
1/2 teaspoon salt
1/2 teaspoon baking soda
1 egg
1 1/2 teaspoons vanilla extract
1/2 cup canned pumpkin
1 teaspoon apple cider vinegar
1 oz unsweetened chocolate, melted (I used Baker's)
3 tablespoons oil
2 tablespoons unsweetened almond milk

butter for the pan

Preparation
Preheat the oven to 350 F.  Butter a standard loaf pan.

Mix together the dry ingredients in a large bowl and set aside.  Mix the wet ingredients in a small bowl making sure the melted chocolate is cool enough not to cook the egg [I melted the chocolate in the microwave (do this slowly or else it will burn) and then mixed in the oil to temper it].  Add the wet ingredients to the dry and mix until evenly combined.

Pour the batter into a buttered loaf pan and smooth out the top with a spoon.  Bake for about 30- 35 minutes (the sides should be slightly pulling away from the pan) and allow to cool for at least 20 minutes in the pan.  Then lightly flip out onto a flat surface to finish cooling.  Once cool, cut the loaf with a very sharp knife into however many squares you'd like.

October 6, 2010

20 Minute Oatmeal Scones

Normally, I'm not a big fan of scones because normally, scones aren't good. I've had many that taste like a stale biscuit or a poor excuse for a cookie; they're dry and crumbly, and all around unappealing. For this reason, I've never made scones, but their homey, rustic, and adaptable nature has always appealed to me (not to mention I do love treats that pair well with tea or coffee).

I was on my way back from yoga today, thinking about what I wanted for breakfast (of course) and I remembered these 15 Minute Oatmeal Scones I read about a day or so ago.  I love the flavor of oatmeal, and while I'm usually too ravenous in the morning to whip up anything out of the ordinary for breakfast, this recipe said they'd only take 15 minutes (but more realistically, I'd say they take 20).

And that was that, I was making scones.  Right when I walked in the door, I preheated the oven and in 20 minutes I was enjoying a warm scone, fresh out of the oven.  The simplicity of this recipe allowed the more subtle flavors of the butter and the oatmeal to come through in a great way.  Topped with almond butter and apricot jam, alongside some greek yogurt and fruit, it was a pretty perfect breakfast. 


20 Minute Oatmeal Scones
Adapted from Eat Live Run (head over to Jenna's blog for more in process shots)
Makes 6 small or 4 large scones

Ingredients
1/2 cup old-fashioned oats
2/3 cup whole wheat pastry flour
1/2 teaspoon salt
1 teaspoon baking powder
2 tablespoons unsalted butter, cut into pieces
1/2 cup milk [I didn't have whole so I used a scant 1/2 cup skim plus about a tablespoon of cream]

Preparation
Preheat your oven to 475 F.  Mix together the oats, flour, salt, and baking powder in a large bowl. Cut in the butter and work with your fingers until the mixture resembles cornmeal. Pour in the milk and mix until just combined.

Pour the mixture onto your lined baking sheet and lightly shape into a circle.  Bake for 13- 15 minutes or until golden. 

September 18, 2010

My Birthday Cake!

I've been making my own birthday cakes for years.  I'm sure it's partially due to some weird control issue I have but, it's mostly because I truly enjoy it.  If you know me, or if you've been reading for awhile, you probably know that I'm extremely indecisive.  From decisions about what color tank top I want to buy to decisions about what I want to do with my life, not much comes easily to me so of course, the decision about what kind of cake to make for my birthday was no exception.

I've had this 
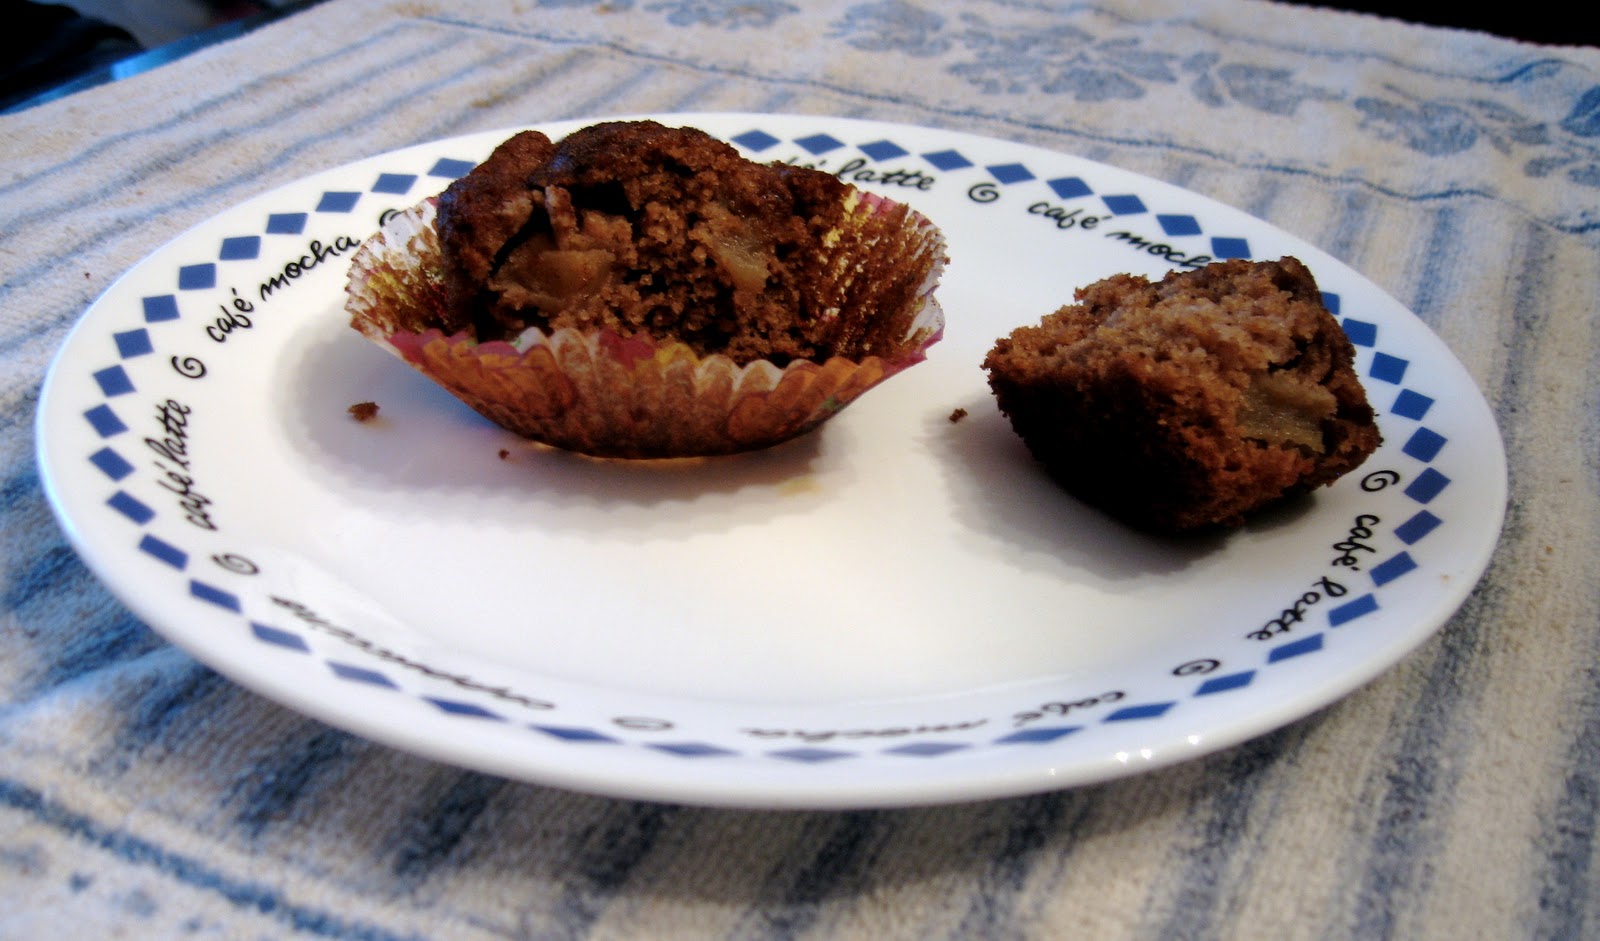
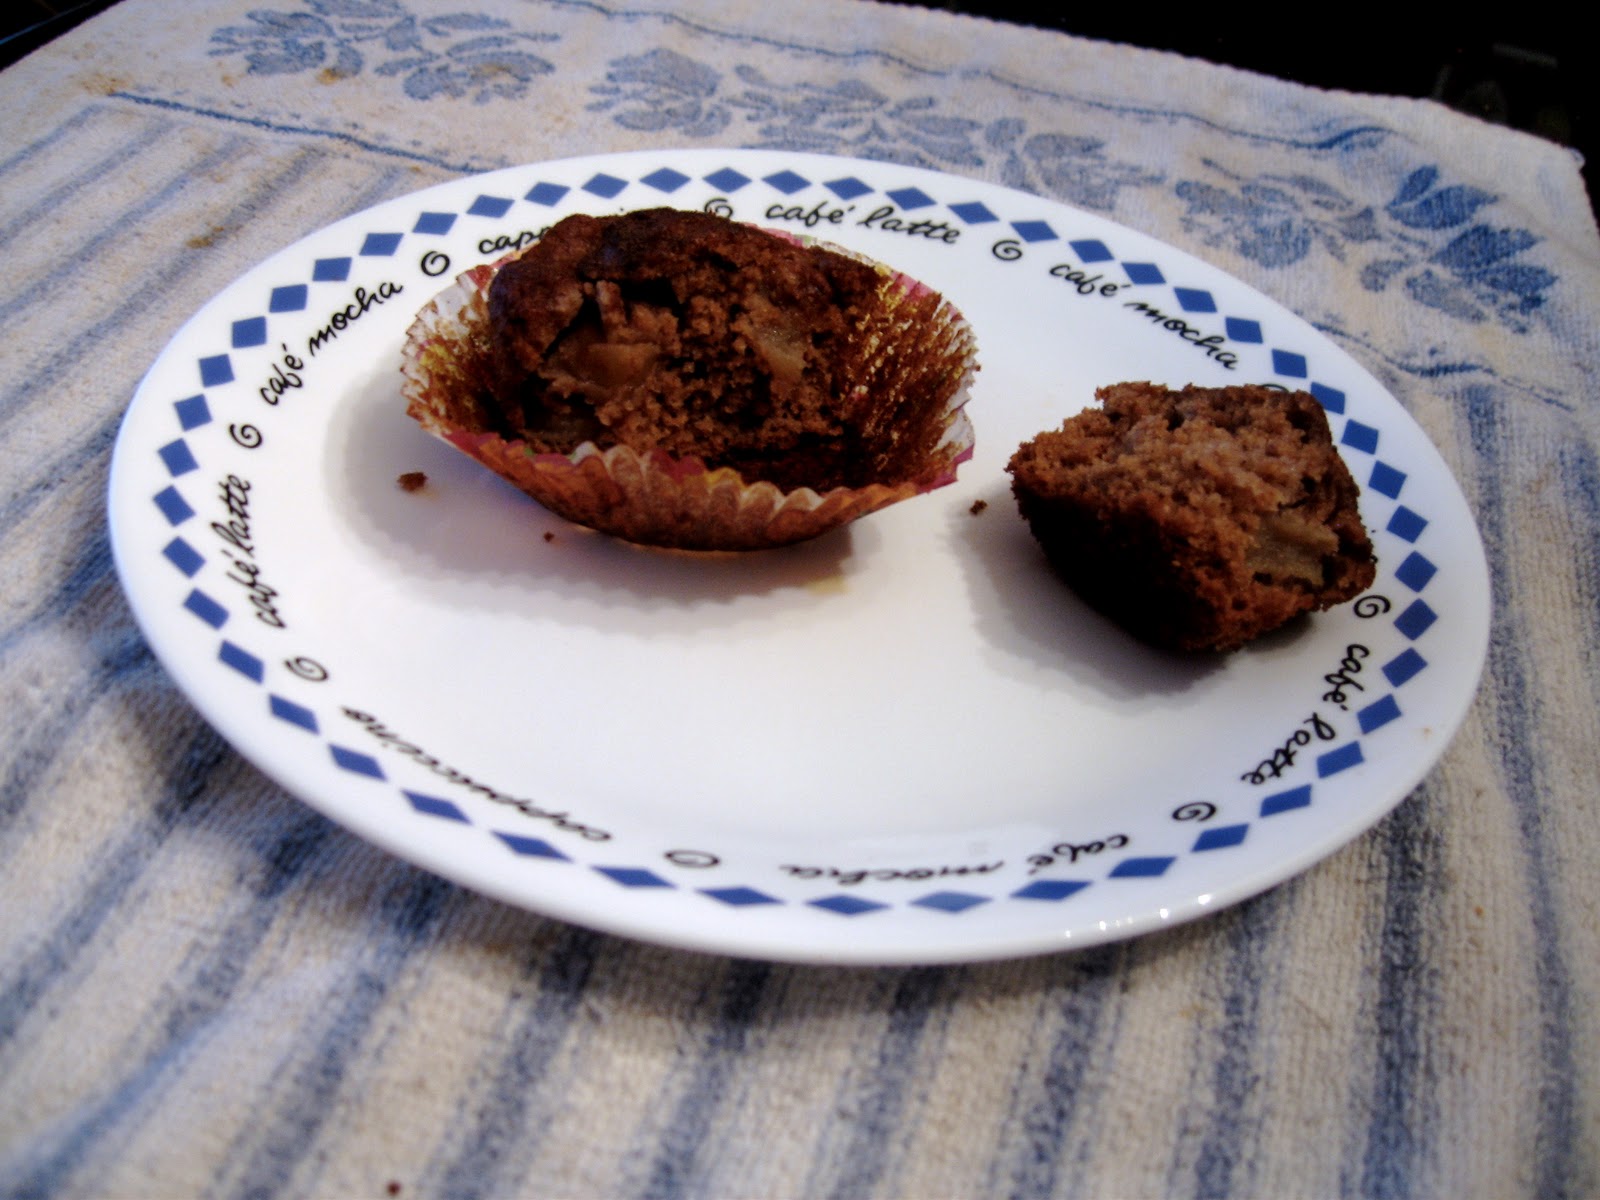
Almond Praline Cake recipe bookmarked for YEARS knowing I'd love it because I love anything almond and anything praline.  The decision should have been easy.  However, a few days before my birthday I was thinking about chocolate cake and I couldn't get it out of my head.  Not wanting to make a boring old chocolate cake for my birthday, I decided to combine the two.  One layer of chocolate cake sandwiched between two layers of almond cake. 

While my inside-out oreo-esque cake was certainly pretty to look at and certainly tasty, my better judgment tells me that the chocolate layer didn't really add anything spectacular taste-wise.  AKA unless you want to create more work for yourself (as I obviously did) you'd be better off saving yourself the trouble and forgoing the chocolate layer*.

That being said, this cake was fabulous.  It turned out just the way I had hoped.  And I really can't say enough good things about the frosting-- it's definitely a recipe I'll using again and again.  Normally, I'm not a big frosting junkie.  In fact, making frosting usually kind of grosses me out; 3 sticks of butter? 4 cups of powdered sugar?  That's just not appealing.  Aside from that, I don't usually find the taste and texture of most frosting to be worth it as in- if you're going to be eating 1/4 stick of butter and 1/2 cup of sugar in one piece it better be damn good. Yes, I've come across good ones that have a ton of butter and sugar but for the most part, frosting is not something I get excited about. 

This frosting, however, was different.  First off, it's very simple.  With only 4 ingredients and a minimal amount of sugar, you wouldn't expect it to taste like much and, yes, it is subtle but it's also amazing.  It tastes like Häagen-Dazs vanilla ice cream and its more toned down flavor allows taste of the cake (or cakes, in my case) to shine through.  It's a perfect complement that is in no way overwhelming.  Also, for all your sugar fiends out there, you will not miss the sugar because this frosting does not taste lacking in any way. 

*The original 3 layer recipe can be found by clicking on the Bon Appétit link underneath the recipe title.  If you decide to use this, it should be noted that I made a few worthwhile changes such as decreasing the amount of almond paste, using 2% milk in the ganache, and decreasing the amount of praline and chocolate bark-- I would say you should stick with these changes though you'll want to do less of a reduction when making 3 layers as opposed to 2, as I've shown here.  I'm sorry if this is confusing... if you want to do this and have any questions please don't hesitate to email me or leave a comment!

Almond Praline Cake with Mascrapone Frosting
This entire recipe is cut down from the original because I chose to make 2 layers instead of 3.  Therefore, I did 2/3 of the ganache recipe, 2/3 of the cake recipe, 1/2 the praline, 2/3 of the frosting, and 1/2 the chocolate bark.
Adapted from Bon Appétit

Ingredients
Ganache filling
Standard.  If I were to make this again I might just make extra frosting and use that in the center.
3/4 cup 2% milk
6 ounces bittersweet chocolate, chopped

Almond cake
1 cup cake flour
1 1/2 teaspoons baking powder
1/2 teaspoon salt
2/3 cup (packed) dark brown sugar
1/2 cup (1 stick) unsalted butter, room temperature (1/2 cup, 1 stick)
1.5 7-ounce packages almond paste,* crumbled into 1-inch pieces
5 eggs
2 teaspoons vanilla extract  
2/3 teaspoon PLUS 1/2 teaspoon almond extract

Almond praline
Delicious.  My only complaint is that the nuts soften and the sugar melts when the cake is stored in the fridge.  I would keep extra on hand to sprinkle on top if you plan on eating the cake over multiple days.
1/2 cup sugar
1 cup whole almonds, toasted

For the mascarpone frosting
Amazing.  This is 2/3 the original recipe.  You might want to make more as I had juuuust enough after a lot of 'sampling'
1 8-ounce containers mascarpone cheese
1 cups chilled heavy whipping cream
2 tablespoons sugar
2/3 tablespoon vanilla extract

For the chocolate bark
If you want to leave anything out, I would say leave this out-- but still do the chocolate drizzle on top for aesthetic reasons!
2 ounces bittersweet chocolate, chopped

Preparation
For the ganache filling
Simmer milk and sugar in medium saucepan, stirring to dissolve sugar. Add chocolate; whisk until smooth. Chill until just spreadable, about 6 hours.

For the almond cake
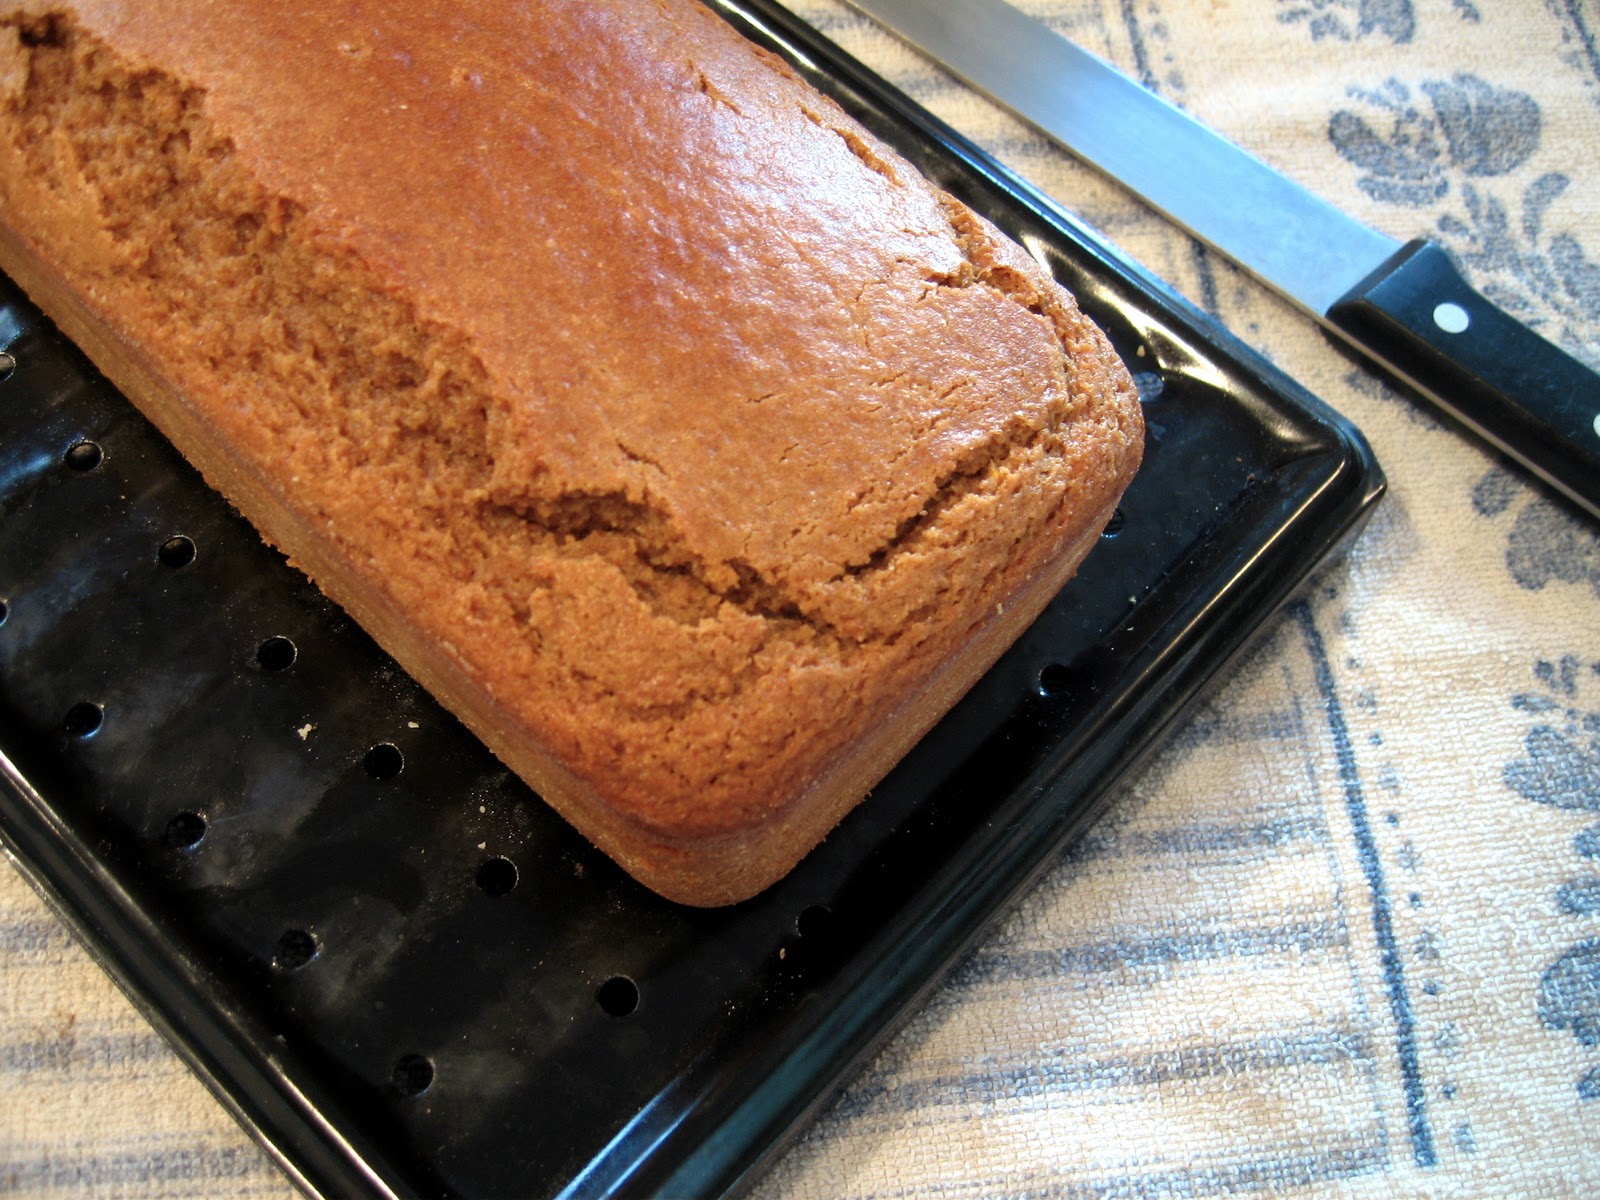
Preheat oven to 350°F. Butter two 9-inch-diameter cake pans with 1 1/2-inch-high sides. Line bottoms with parchment paper; dust pans with flour. Whisk flour, baking powder, and salt in bowl. Using heavy-duty mixer, blend brown sugar and butter in large bowl. Beat in almond paste 1 piece at a time, then beat until smooth. (NOTE: I did this in the Cuisinart because I don't have a standing mixer and breaking up the almond paste by hand was not going to happen.  Breaking the paste into pieces and putting it in the microwave for 10 or so seconds is also helpful)  Add eggs 1 at a time, beating well after each addition. Beat in extracts. Fold in dry ingredients. Divide batter among pans; smooth tops. Bake cakes until tester inserted into centers comes out clean, about 25 minutes. Cool cakes in pans on rack.

For the almond praline
Line baking sheet with foil. Stir sugar and 1/4 cup water in heavy medium saucepan over medium-low heat until sugar dissolves. Increase heat; boil without stirring until deep amber, swirling pan and brushing down sides with wet pastry brush occasionally. Mix in nuts. Pour onto foil; cool. Peel foil off praline. Chop praline coarsely. DO AHEAD Praline can be made 1 day ahead; store airtight at room temperature.

For the mascrapone frosting 
Beat all ingredients in large bowl just to soft peaks (do not overbeat or mixture will curdle). 

For the chocolate bark
Line baking sheet with foil. Melt chocolate in small bowl set over saucepan of simmering water. Stir until smooth. Remove from over water. Drizzle all but 1 tablespoon chocolate over foil in thick (about 1-inch-wide) zigzag lines (chocolate will pool in spots). Sprinkle 3 tablespoons praline over chocolate; chill bark until firm, about 1 hour. 

Devils Food Cake
From David Lebovitz

Ingredients
4.5 tablespoons unsweetened cocoa powder
3/4 cup cake flour (not self-rising)
1/4 teaspoon salt
1/2 teaspoon baking soda
1/8 teaspoon baking powder
2 ounces (1/2 stick) unsalted butter, at room temperature
3/4 cup granulated sugar
1 large egg, at room temperature
1/4 cup strong coffee
1/4 cup 2% milk

Preparation
Adjust the oven rack to the center of the oven and preheat the oven to 350 degrees.  Butter a 9″ x 2″ cake pan and line the bottom with circles of parchment paper.

For the cake
Sift together the cocoa powder, cake flour, salt, baking soda, and baking powder in a bowl.

In the bowl of a standing electric mixer, or by hand, beat together the butter and sugar about 5 minutes until smooth and creamy. Add the egg until fully incorporated. (If using a standing electric mixer, stop the mixer as necessary to scrape down the sides to be sure everything is getting mixed in.)

Mix together the coffee and milk. Stir half of the dry ingredients into the butter mixture, the add the coffee and milk. Finally stir in the other half of the dry ingredients.

Pour the batter into prepared cake pan and bake for 25 minutes, or until a toothpick inserted into the center comes out clean. Cool completely before frosting.

ASSEMBLY
Run knife around pan sides to loosen cakes. Turn cakes out; peel off paper. Place 1 layer Almond Cake on platter. Spread half of ganache over; sprinkle with 3 tablespoons praline. Top with Chocolate Cake layer. Spread remaining ganache over; sprinkle with 3 tablespoons praline. Top with second Almond Cake layer. Spread frosting over top and sides of cake. 

Press praline around bottom 2 inches of cake; sprinkle more atop. Peel foil off bark; break into pieces. Press edges into frosting atop cake. Remelt 1 tablespoon chocolate over simmering water, stirring often. Using spoon, drizzle chocolate over cake.  

DO AHEAD: I made the praline and the two Almond Cake layers the day before.  The day of I made the ganache, chocolate bark, chocolate cake (could be made the day before but I was missing an ingredient) and the frosting.  While the original recipe says you can assemble the cake and put it in the fridge ahead of time, I would not suggest this because the praline softens and looses its crunch. 

August 23, 2010

Time Crunch S'mores Tart

I'd been craving s'mores for weeks but was thwarted in my first attempt by a box of stale graham crackers and some rock hard marshmallows from the depths of my parents pantry.  After said disappointment, I imagined making my own graham crackers and my own marshmallows and using some fancy chocolate to make a kind of gourmet s'more.

Unfortunately(?), my cravings and a fast approaching occasion got the best of me.  One of my good friend's birthdays was a few hours away and I couldn't imagine buying a cake from the store (the horror!).  I knew she'd appreciate a s'mores tart, but I also knew I didn't have nearly enough time to make all the components by myself.  So I took a shortcut, which though I don't do often, I also don't regret.  
This took about an hour to make, baking and setting time included, and if you're curious about how it tasted, come on, when are s'mores ever not good?  In the end, I think using all the old school (read: processed) ingredients (Nabisco graham crackers, Campfire marshmallows) wasn't such a bad thing.  I'm not sure you could achieve the same kind of nostalgia with the homemade varieties.

Time Crunch S'mores Tart
There are a million variations you could do on this, such as picking and choosing which components to make or not make from scratch or doing a meringue topper as Big City, Little Kitchen does.  Have fun with it!
Adapted from Big City, Little Kitchen

Crust
1 1/4 cup graham cracker crumbs
3 tablespoons brown sugar
4 tablespoons melted butter [I think an extra tablespoon would be helpful here]

Filling
4 ounces semi-sweet chocolate, finely chopped
4 ounces bittersweet chocolate, finely chopped
1 cup whole milk
1/2 tsp vanilla extract

Topping
Mini marshmallows (as many as you want!)

Preparation
Preheat oven to 350 degrees F.

Crust 
In a medium bowl, stir together crumbs, sugar, and melted butter with a fork, until all ingredients are well-incorporated and mixture resembles wet sand. Using the back of a spoon (or your fingers), press evenly into the bottom and up the sides of a 9-inch tart pan (it will be delicate). Place pan on baking sheet, and bake for 8 minutes, then cool completely. [note: because I was in a rush I did not "cool completely and it was fine... I just stuck the whole thing in the freezer after pouring in the chocolate mixture]

Filling
Heap the chopped chocolate into a medium heat safe bowl. In a saucepan over a medium heat, heat the milk until steaming, stirring often; pour into bowl over chocolate. Whisk until all chocolate is melted into milk, then whisk in vanilla; let cool completely. [as stated in my note above, I ignored the "cool completely" instruction]

Assemble
Pour chocolate into shell. Refrigerate at least 30 minutes (or freeze for 15-20 if you're in a time crunch), or until firm. Preheat the oven’s broiler. Top the tart with as many marshmallows as you'd like.  Put tart on baking sheet and ease under broiler; cook for 30 seconds to 1 minute, or until the tops of the marshmallows are nicely browned*. Carefully remove tart pan from baking sheet and put back in refrigerator for another 30 minutes or so, allowing the chocolate filling to reset. To serve, carefully remove tart pan, and slice with a very sharp knife.

 * If you're wondering why my marshmallows don't exactly look toasty, I brought the tart to an apartment my friend was house-sitting at and we couldn't figure out the broiler on her 1960's oven.  It was unfortunate but we made do with a lighter and some patience (and it was still pretty darn good).

August 6, 2010

Triple C Vegan Veggie Burgers

When I lived in St. Louis and worked way too many hours for not enough money, I needed quick, easy, healthy and hassle-free lunch options.  With only 30 minute break, much less a 10 minute break, or even worse NO BREAK AT ALL (what is the world coming to?), fast, portable and satisfying lunches were a much needed accessory.

Since I try not to over-do it with soy (I can talk more about this in the comments if anyone's interested), especially the overly processed kind that's in most commercial veggie burgers, soy nuggets and the like, I've stopped buying most grocery store veggie burgers (textured soy protein, anyone?) and instead opted to make my own.  I've tried a lot of different recipes and have always had good results but I guess I never thought they were "blog worthy." 

What I like about making your own veggie burgers is that they're very forgiving and completely customizable.  You can pretty much use any kind of beans, grains, veggies, and spices you want and chances are they'll come out tasting pretty darn good (especially with some hummus and avocado).  So here's one of my most recent recipes; I love that its simplicity doesn't compromise the flavor at all.  I call them Triple C Burgers because they're made with Chickpeas, Carrots, and Chipotle seasoning.

Triple C Vegan Veggie Burgers
Adapted from Angela's Curry Chickpea Burgers

Ingredients
1/2 cup rolled oats
2 large carrots, roughly chopped
1 tablespoon tahini
2 teaspoons (or to taste) smoky chipotle seasoning (I used this one
1/4 cup roasted salted pepitas (or unsalted and add a bit of sea salt)
1 15oz can chickpeas (or about 2 cups freshly cooked chickpeas)

Preparation
Preheat oven to 375F. Line a baking sheet with parchment paper and set aside.

In a food processor, process the oats, carrots, tahini and the seasoning for 30 seconds or until somewhat smooth. Now add in the chickpeas stopping to scrape down the bowl as necessary. Once the chickpeas are mostly processed and smooth, take the mixture and place in a medium sized bowl. Stir in the pepita seeds. Wet your hands and into about 6 patties.

Bake for about 15 minutes on each side.

July 30, 2010

Black and White Cookies

There are many recipes I've been keeping from you lately but it's more out of blogger lazyness than a real desire to keep them hidden.  There are some Vegan Chipotle Veggie Burgers, an Israeli Cous Cous Salad with Broccoli Pesto, yummy Buckwheat Granola and, oh yeah, these Black and White Cookies.

I decided to share this one today because, well, it's the best looking and I guess I'm superficial like that. I was  so happy with the way these cookies turned out.  Instead of being 'brown and white,' which was a momentary fear, and instead of sloppy lumpy frosting or wonky elliptical shapes, to me, they looked New York bakery-style authentic.

I made these with a great friend from high-school (and fellow baking enthusiast) and we both thought the texture (cake-y cookie, smooth hard-when-set frosting) was pretty spot on.  Though Black and Whites aren't the most flavorful cookie (our families reminded us of that when they tried them), we both thought the taste was nearly identical to those that you'd buy from a local bakery.  The cookie was tender with a very subtle lemon-y undertone and the chocolate frosting was quite good.  The white frosting, however, could be improved and I've added suggestions for doing just that to the recipe below.

Overall, I thought these cookies were a big success and if you're someone who takes pleasure in time consuming and precise recipes (like me) then I think you'll find them a joy to make.

Black and White Cookies 
Makes about 32 medium-large cookies
Ingredients

For Cookies
Barely adapted from Gourmet

3 ¾ cups all-purpose flour
1 ½ teaspoons baking soda
1 ½ teaspoons salt
1 cup well-shaken buttermilk
1 ½ teaspoon vanilla
1 cup (2 sticks) unsalted butter, softened
1 ½ cup granulated sugar
1 teaspoon lemon zest (or 1/4 teaspoon lemon extract)
3 large eggs

For Icing
I think adding a 1/4 teaspoon lemon zest or an 1/8 teaspoon lemon extract to ONLY the vanilla frosting might help the flavor even more.  If you decide to do this, make sure you split the frosting mixture in half (note in prep. before adding in the lemon, otherwise you'll also have lemon-y chocolate).
Barely adapted from Smitten Kitchen
 
4 cups confectioners’ sugar

1 teaspoon vanilla (optional)
1/3 to 1/2 cup water
[I needed at least 2/3 of a cup added over time]
3 ounces very bitter or unsweetened chocolate

1 teaspoon light corn syrup
1 to 2 tablespoons unsweetened cocoa (optional)

Preparation

For Cookies
Preheat oven to 350°F. Whisk together flour, baking soda, and salt in a bowl. Stir together buttermilk and vanilla in a cup.

Beat together butter and sugar in a large bowl with an electric mixer until pale and fluffy, about 3 minutes, then add the lemon zest and egg, beating until combined well. Mix in flour mixture and buttermilk mixture alternately in batches at low speed (scraping down side of bowl occasionally), beginning and ending with flour mixture. Mix until smooth.

Spoon 1/4 cups of batter (I made my cookies slightly smaller than this for a more manageable size) about 2 inches apart onto a parchment lined baking sheet using the back of a spoon or your finger to shape them into neat circles.  Bake in middle of oven until the edges begin to brown 15 to 17 minutes (for large cookies). Transfer with a metal spatula to a rack to cool.

For Icing
Boil a cup or so of water in a small pot. Place confectioners’ sugar in large, heat-safe mixing bowl. Gradually stir in enough boiling water to the sugar to make a thick, spreadable mixture. Err on the side of caution because a too-thin frosting is hard to undo. Leave remaining boiling water on the stove.

Mix in the vanilla. (If you're going to add lemon zest or extract to the white frosting, split the confectioners sugar/water mixture in half at this point and only add the lemon to half) Spread frosting on half of the flat side of each cookie (the side that was against the baking sheet). Once all cookie halves have been frosted, place the bowl of the remaining frosting over the hot water and bring it back to a simmer (creating a double-boiler). Stir in the bitter or unsweetened chocolate until melted, as well as the light corn syrup.

Ice the remaining half of the cookies with the chocolate frosting. I find that the chocolate frosting is especially prone to getting too dry, so don’t worry about whisking in an extra teaspoon or so of that hot water from time to smooth it back into a shiny frosting.

Let the frosting set. Store in an airtight container. These cookies keep for a few days, but are best on the first or second. Because of the cake nature of the bases, they can get stale quickly.